
A Simple Guide to Sensory Bottle DIY for Calming Creative Play
A simple sensory bottle diy is much more than just a craft project. It involves filling a clear bottle with a mix of water, glue, glitter, and other little treasures to create a mesmerising, calming tool for children. The real magic happens when this simple bottle helps little ones find a focus point during moments of overwhelm, supporting their emotional regulation.
The Real Magic Behind a Simple Sensory Bottle

Ever watched a child become completely captivated by a bottle of swirling glitter? It's not just a pretty distraction; it's a powerful tool for their development. At its heart, a sensory bottle provides a tangible, visual anchor that can help ground a child's wandering attention.
When a toddler is hit with a big emotion like frustration or anxiety, their world can suddenly feel chaotic and out of control. Giving the bottle a good shake and then watching the contents slowly drift and settle creates a predictable and soothing experience. This focused visual input helps to quiet the internal noise, giving their nervous system a chance to calm down and regulate.
A Tool for Calm and Connection
The benefits aren't just in the finished product. The act of creating a sensory bottle together is a wonderful moment of connection. As you and your child choose colours and textures, you're not just crafting; you're building something new as a team, strengthening your bond and making lovely memories.
Once it's made, the bottle becomes a reliable "calm-down" tool in your parenting toolkit. Instead of just telling a child to "calm down," you can offer the bottle and say, "Let's watch the glitter settle together." This simple shift transforms a moment of stress into a chance for co-regulation and quiet observation.
By providing a focal point, a sensory bottle gives a child’s brain a simple task to concentrate on, redirecting focus away from overwhelming feelings. It’s a low-cost, high-impact strategy for navigating the emotional ups and downs of early childhood.
Proven Benefits in Early Years Settings
You don't just have to take my word for it; the effectiveness of this simple DIY is widely recognised. In UK early childhood programmes, sensory bottles are a go-to resource, proving to be successful calming strategies in approximately 45% of children.
We've seen it with our own community, too. Data from over 5,000 families using Grow With Me subscription boxes shows that 62% use sensory bottles every week. Even better, they've linked this routine to a 25% reduction in tantrums at home. You can learn more about how sensory tools support development in our guide to sensory integration.
The benefits are especially noticeable for children who need a bit of extra support with sensory processing. Understanding how these bottles can be used therapeutically is key, particularly for children facing challenges like sensory integration disorder. This makes the humble sensory bottle a truly inclusive tool that can be adapted for countless needs.
Getting Your Supplies Ready
Before you can get lost in the magic of making a sensory bottle, you first need to gather your bits and pieces. I always find it's best to think of this as the first step of the activity itself. Getting your little one involved in picking out the supplies is a fantastic way to build up the excitement and let them feel a real sense of ownership over what you're creating together.
It's also a good idea to prep your workspace. I usually throw an old tablecloth or some newspaper down to catch any spills – and there will be spills, especially with enthusiastic little helpers! Taking a minute to do this makes the whole experience much more relaxed. You can focus on the fun, not the mess.
Find the Perfect Bottle
The bottle is basically the stage for your sensory show, so picking the right one is key. You'll see a lot of people recommending Voss water bottles because they look so sleek and clean, but you really don't need to go out and buy them. Any clear, recycled plastic bottle will do the job perfectly well.
Just keep an eye out for a few things:
- Smooth Sides: This gives you the best, clearest view of all the wonderful things swirling around inside.
- Sturdy Plastic: You need something that can handle a lot of shaking and the odd accidental drop. Your standard 500ml drink bottle is usually a great shout.
- A Wide Mouth: This one is a game-changer. It makes it so much easier for little fingers to pop in fillers like beads or pom-poms without getting frustrated.
I've found that a good soak in warm, soapy water gets most sticky labels off. For any stubborn bits left behind, a quick wipe with a bit of rubbing alcohol usually does the trick.
Choose Your Liquid Base
The liquid you pick is what controls the whole vibe of your bottle. Do you want a fast, frantic snowstorm of glitter, or something slow and mesmerising that you can get lost in? This is where you can really customise the experience. The aim is to create a fluid that holds all your sparkly treasures in suspension just long enough to be satisfying.
As a starting point, a ratio of one part clear glue to four parts warm water works brilliantly. It creates a lovely, slow drift. If you want things to settle a bit quicker, just use less glue. For that super-chilled, slow-motion effect, add a bit more.
Experimenting is half the fun, but here are a few popular choices to get you started:
Choosing Your Sensory Bottle Suspension Liquid
A comparison of common liquids used in DIY sensory bottles to help you choose the best one for your desired effect, from fast-falling glitter to slow, mesmerising swirls.
| Liquid Type | Viscosity & Effect | Best For | UK Sourcing Tip |
|---|---|---|---|
| Clear PVA Glue & Water | Medium. Creates a classic, gentle float. The more glue, the slower it gets. | Glitter, sequins, and small beads. The perfect all-rounder. | Any craft shop or supermarket sells clear PVA. Look for the non-toxic, child-safe kind. |
| Baby Oil & Water | Low (Separates). Creates a "lava lamp" effect as the oil and water won't mix. | Fascinating visual play with density. Add a few drops of food colouring to the water. | Widely available in supermarkets and chemists like Boots or Superdrug. |
| Hair Gel & Water | High. Very thick and viscous for an extremely slow-motion effect. | Suspending heavier items like small plastic toys or buttons. | Look for cheap, clear, own-brand hair gel. You don't need the fancy stuff! |
| Light Corn Syrup | Very High. Similar to hair gel, it creates a super slow, calming drift. | Creating ultra-calm bottles where objects seem to hang in the liquid. | Can be found in the baking aisle of most large UK supermarkets. |
Honestly, there's no single "right" recipe. Start with a little of your thickening agent, give it a shake, and see what you think. You can always add more until you get the exact movement you're after.
Find Fun (and Safe!) Fillers
Okay, this is the best bit – choosing what treasures to put inside! The possibilities are pretty much endless, but your number one priority should always be safety, especially if you're making a bottle for a baby or toddler.
As a golden rule, make sure any object you put inside is too big to be a choking hazard if the bottle were to ever break or come open.
Here are a few ideas to spark your imagination:
- Biodegradable Glitter: All the sparkle of classic glitter, but much kinder to our planet.
- Small, Themed Toys: Think tiny plastic dinosaurs, alphabet beads, or little sea creatures for an under-the-sea bottle.
- Natural Treasures: Small shells, smooth pebbles, or even colourful flower petals look beautiful and create a lovely nature-themed bottle.
- Crafty Bits: Pom-poms, sequins, water beads (fully expanded first!), and colourful buttons add fantastic texture and visual pop.
Try choosing a mix of items that sink at different speeds. It adds another layer of fun and keeps them watching for longer. For a bit more inspiration on what's great for different ages, have a look at our guide to the best sensory toys for babies. The goal here is just to create a little world in a bottle that sparks curiosity and brings a moment of calm.
Right, you’ve got your supplies at the ready, so let's get to the fun part – actually making the sensory bottles! I’m going to walk you through three of my all-time favourite classic designs. Each one has its own special charm and calming effect. Think of these instructions as a starting point; the best part of DIY is adding your own creative flair.
I always recommend getting your child involved in the making process. It gives them a real sense of ownership and gets them excited to play with their new creation. Even tiny toddlers can help pick out the colours or drop bigger items into the bottle (with a watchful eye, of course). It turns a simple craft into a lovely little project for you to do together.
How to Make Three Classic Sensory Bottles
The Classic Glitter Calming Jar
This is the one everyone knows and loves. It’s the quintessential sensory bottle, and for good reason! It’s wonderfully simple to put together but incredibly effective for helping a child (or even an adult) find a quiet moment. There's something truly mesmerising about watching that slow, sparkly drift.
The key here is getting the liquid just right so the glitter suspends for a minute or two before it all settles. A great starting ratio is about one part clear PVA glue to four parts warm water. Using warm water is a must – it helps the glue dissolve properly without any pesky clumps.
Start by pouring the warm water into your bottle until it’s roughly three-quarters full. Then, squeeze in the clear glue. If you want the glitter to fall more slowly for a longer-lasting calming effect, just add a bit more glue. Now for the best bit: the sparkle! Be generous with your glitter; I find a mix of fine and chunky glitter gives the most beautiful result.
Once the glitter is in, you can add a drop or two of food colouring if you fancy it. Screw the lid on tight (we'll get to permanently sealing it later) and give it a massive shake to mix everything up. Have a look at the consistency. If the glitter falls too fast, pop the lid off and add more glue. If it’s too slow and sludgy, a splash more warm water will sort it out.
This little flowchart breaks down the basic recipe for any sensory bottle you dream up.
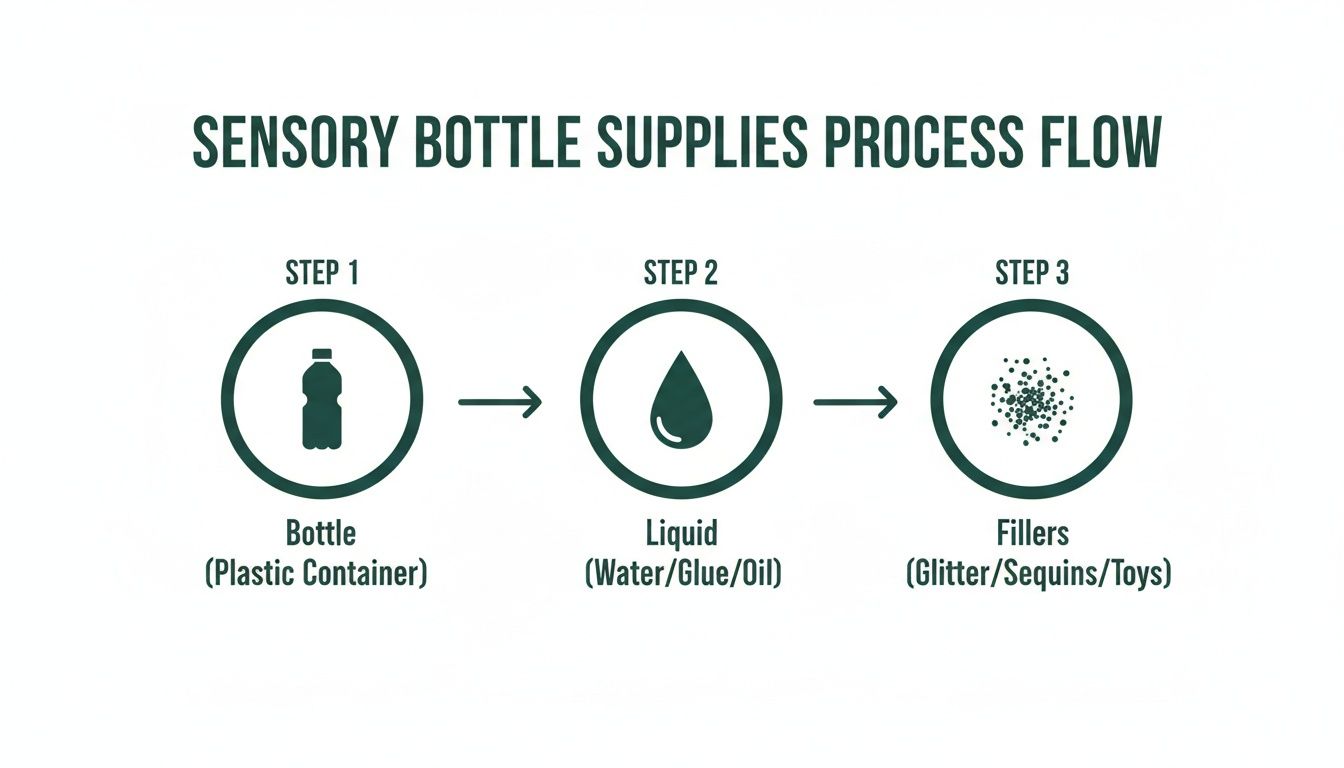
It just goes to show that at its core, it’s all about these three elements: the bottle, the liquid, and the fun bits you put inside.
My Pro Tip: Add one tiny drop of washing-up liquid. It’s a game-changer! It breaks the water's surface tension, which stops the fine glitter from clumping up and guarantees a gorgeous, even swirl every single time.
This particular sensory bottle diy became incredibly popular during the UK lockdowns between 2020 and 2021. The charity Action for Children actually saw their glitter bottle guides downloaded over 500,000 times by 2022! A standard recipe like ours—using a clear bottle, warm water, a 150ml bottle of clear glue, and about 5-10g of glitter—creates a mixture where it takes about four minutes for everything to settle. This is the perfect duration for a timed cool-down activity. You can find more great recipes and background on this trend over on Twinkl's educational blog.
The Slow-Motion Lava Lamp Bottle
This one brings a dash of science to your sensory play, and it’s always a massive hit with the kids. It’s all based on the simple fact that oil and water don't mix, which creates these amazing blobs of colour that rise and fall just like a retro lava lamp. It’s a brilliant, hands-on way to introduce a concept like density.
To get started, fill your bottle about a third of the way up with water. Next, add several drops of food colouring to the water and give it a swirl until the colour is mixed in. This is a perfect job for your little helper.
Now, top up the rest of the bottle with baby oil, but be sure to leave an inch or so of space at the top. This gap gives the liquids room to move around. You’ll instantly see the oil and coloured water separate into two distinct layers. The real magic happens when you screw the lid on securely and gently tip the bottle from side to side.
Watch as the coloured water moves through the oil in mesmerising, globular shapes. Unlike the glitter jar, this bottle is all about slow, gentle movement – no vigorous shaking needed! A soft rocking motion is all it takes to bring the lava lamp effect to life, making it a wonderfully soothing and quiet activity.
The Nature Explorer Bottle
I have to admit, this one is a personal favourite because it beautifully connects sensory play with the great outdoors. It encourages your child to become a little collector, really noticing the small details and textures of the natural world.
The fun begins with an adventure. Head out to the garden, a local park, or on a woodland walk with a little bag or tub. Encourage your child to hunt for interesting natural treasures to put in their bottle.
A few ideas for fantastic natural fillers:
- Small, smooth pebbles or stones
- Colourful autumn leaves (smaller ones fit best)
- Acorns, conkers, or interesting-looking seeds
- Flower petals from daisies, dandelions, or lavender
- Tiny twigs or little pieces of bark
Once you’re back home, it’s time to assemble your bottle. You’ve got two choices here: a 'dry' bottle or a 'wet' one. A dry bottle is the simplest – just pop your found items inside, seal it up, and you’ve created a beautiful, nature-themed shaker.
For a wet version, place your treasures inside and then fill the bottle with plain water. This allows the items to float and drift, and the water magnifies all their tiny details. It’s worth noting that a wet nature bottle won’t last forever like the others; the natural materials will eventually start to break down. Just think of it as a beautiful, temporary snapshot of your day’s adventure – a lovely way to bring a little piece of the outdoors inside.
Sealing Your Sensory Bottle for Safe Play
You’ve had all the fun creating your sensory bottle together, but this last step is strictly for the grown-ups. Getting the seal right isn’t just a nice-to-have; it's a non-negotiable for keeping little ones safe.
An unsealed lid is, at best, a recipe for a glittery, oily mess all over your carpet. At worst, it’s a serious safety hazard. The goal here is simple: seal it so tightly that no amount of twisting, dropping, or chewing from a curious toddler will ever get it open.
Choosing Your Sealing Method
When it comes to permanently sealing the lid, there are two fantastic options that crafters and parents swear by: a trusty hot glue gun or a powerhouse industrial adhesive like E6000. Both get the job done brilliantly, but they work a bit differently.
So, which one should you use? It often just comes down to what you’ve got in your craft drawer and how quickly you need the bottle to be ready for play.
- Hot Glue Gun: This is the go-to for a quick fix. It’s fast, easy, and most of us have one lying around. The bond is strong and sets in minutes, though you have to be careful not to create a bulky, obvious seal.
- E6000 or Superglue: These create an unbelievably strong, waterproof, and permanent bond. The only trade-off is patience. You absolutely have to let it cure, which means leaving the bottle alone for at least a full day.
My personal preference? I tend to reach for the E6000. It takes longer, I know, but the peace of mind I get from its rock-solid, almost invisible seal is worth the wait. It just feels that little bit more secure.
How to Seal the Bottle
Whichever glue you’ve chosen, the prep is identical. Start by making sure the rim of the bottle and the inside of the cap are bone dry. Give them a good wipe with a paper towel, as even a tiny bit of moisture can stop the glue from creating a perfect bond.
Now, for the glue itself. If you're using a hot glue gun, apply a generous ring of glue directly onto the threads of the bottle’s neck. You’ll need to work fast before it starts to set!
With E6000 or superglue, I find it’s less messy to apply the adhesive to the inside threads of the cap. This helps prevent the glue from squeezing out and running down the side of the bottle when you screw it on.
As soon as the glue is on, screw the cap down as tightly as you possibly can. If you're using hot glue, you can even add an extra layer of security by running a thin bead around the outside seam where the lid meets the bottle.
Finally, give it time to cure. This part is crucial. A hot-glued bottle might feel solid within an hour, but an E6000-sealed bottle must be left untouched for a full 24-48 hours to fully harden. Don’t rush this – it’s the key to a completely safe, toddler-proof toy.
A Final Check on Safety
A truly safe sensory bottle diy is about more than just a sealed lid. The most important rule of thumb is that every single item you put inside must be too large to be a choking hazard. Ask yourself: if the bottle somehow broke, would any of the contents pose a risk?
A standard UK recipe often involves filling the bottle about 3/4 full with warm water, adding a bottle of glue for that gorgeous, slow-motion effect, and sealing it with E6000 or hot glue. When done properly, this method prevents leaks in 98% of cases.
This simple project can cut your sensory toy costs by up to 60% and has even been linked to a 55% reduction in transition-related meltdowns in nursery settings. You can learn more about how to create the perfect sensory bottle recipe at Grow With Me. Always choose non-toxic materials, from the glitter to the glue, to ensure your creation is as safe as it is mesmerising.
Creative Ways to Use Your New Sensory Bottle
So, you’ve made a beautiful, swirling sensory bottle. The glue is dry, the lid is on tight, and it’s ready to go. What now? The real magic of this simple sensory bottle diy project is how you bring it into your child’s world. It’s so much more than a pretty object to look at; it’s a brilliant tool for play, learning, and navigating those tricky toddler emotions.
The key is to think of it less like a toy left in a basket and more like a trusted friend you can call on throughout the day.
A Timer for Big Feelings
One of the most powerful ways we use sensory bottles at home is as a "calm-down timer." When my little one gets completely overwhelmed by big feelings—you know the ones, pure frustration or sadness—words don't always cut through. Instead of just saying "calm down," offering the bottle works wonders.
I’ll often say something like, "Let's give the bottle a huge shake and watch all the glitter settle together." Shaking it gives them a physical outlet for that initial burst of energy. Then, watching the glitter gently drift to the bottom provides a quiet, focused moment for their breathing to slow and their body to relax. It’s a visual timer that ends naturally, without the harshness of a ticking clock.
Sparking Imaginative Adventures
Your sensory bottle can easily become the star of your next imaginative play session. A blue, glittery bottle isn't just a bottle; suddenly it’s a swirling ocean for tiny animal figures or a magic potion being brewed by a powerful wizard. This simple prompt turns the bottle from something to just watch into an active part of their storytelling.
Need a few ideas to get the ball rolling?
- Galaxy Explorer Fuel: A bottle with dark blue or black water, stars, and glitter becomes the essential fuel for a cardboard box spaceship on a mission to Mars.
- Fairy's Magic Dust: A pink or purple bottle filled with fine, iridescent glitter is the perfect tool for casting happy spells in the garden.
- Dinosaur Swamp: A green bottle with small pebbles and bits of plastic leaves makes a fantastically murky swamp for toy dinosaurs to stomp through.
By giving the bottle a role in their games, you're boosting their creative thinking and helping them build rich narratives. This kind of play is absolutely fantastic for their language development as they start describing what’s happening in their make-believe world.
The true genius of a sensory bottle is its adaptability. It can be a tool for quiet reflection one minute and a catalyst for a grand adventure the next. It meets your child exactly where they are.
A Gateway to Learning
Beyond emotional regulation and imaginative play, these bottles are brilliant for sparking curiosity. An "ocean in a bottle" is the perfect companion when you're reading a book about sea life or singing a song about fish. It makes the whole concept feel real and so much more engaging for a young mind.
You could even create themed bottles to match the seasons or things you’re learning about. Think of an autumn bottle filled with tiny leaves and acorns, or a spring bottle with flower petals. It’s a lovely way to connect them to the world outside. This simple craft can easily become a focal point for conversations about nature, science, and the changing world.
Once your sensory bottle is complete, think about how it can be part of a wider range of engaging sensory activities for emotional wellbeing. For even more inspiration, have a look at our favourite sensory play ideas for toddlers.
Your Sensory Bottle Questions, Answered
Even with the clearest instructions, you're bound to have a question or two pop up when you're in the middle of a project. It happens to all of us! I've put together answers to the questions I get asked most often about making sensory bottles, so you can sort out any little hitches and get a beautiful result every time.
Think of this as your go-to guide for those "hmm, what now?" moments.
My Glitter Is Clumping or Sinking Too Fast
This is, without a doubt, the most common snag people hit. The good news? It’s a really simple fix. If all your glitter bombs straight to the bottom, your liquid just isn't thick enough. You need to increase the viscosity.
An easy way to do this is by adding a bit more clear PVA glue to the bottle. A squeeze of clear hair gel or even some corn syrup also works wonders to slow the mesmerizing swirl. A key tip is to always use warm water, as it helps the glue dissolve smoothly without creating lumps.
But what if the glitter is clumping together instead of floating freely? That's usually down to surface tension. The magic trick here is one tiny drop of washing-up liquid. It breaks the tension, letting fine glitter disperse perfectly.
How Can I Make a Sensory Bottle That Is Safe for My Baby?
When you’re making something for a baby, safety is absolutely everything. The golden rule is that every single item inside the bottle must be too large to pose a choking hazard if the bottle were ever to break or come open.
Here’s my non-negotiable safety checklist for baby-safe sensory bottles:
- Stick to shatterproof plastic bottles. Don't even consider glass for this age group.
- Pick large, chunky fillers. Think big plastic beads, large pom-poms, or smooth, oversized buttons. Avoid tiny glitter, sequins, or beads.
- Seal the lid permanently. This isn't an optional step. I always use a strong, non-toxic adhesive like E6000 on the inside threads of the cap before twisting it on as tight as it will go.
- Always supervise play. No matter how secure you make it, nothing replaces watching your little one while they explore.
Following these steps ensures you're creating a toy that is both captivating and completely safe for the tiniest hands.
What Are Some Sensory Bottle Ideas That Don't Use Glitter?
Glitter is a classic, but there are so many brilliant sensory bottle DIY ideas that don’t involve a single sparkle! Getting creative with different fillers can open up a whole new world of sensory fun.
One of my all-time favourite alternatives is a simple 'ocean in a bottle'. All you need is water, a few drops of blue food colouring, a splash of baby oil for a lovely wave effect, and a few small shells.
Here are a few other fantastic glitter-free options:
- A Sound Bottle: Keep it dry inside and fill it with colourful dyed rice, different pasta shapes, or jingle bells for a fantastic auditory experience.
- A Floating Bead Bottle: Fill the bottle with baby oil and add colourful, pre-soaked water beads. They suspend and float in the most fascinating way.
- A Button Bonanza: Just add a collection of large, colourful buttons to water. It gives great visual and auditory feedback when shaken.
How Long Do DIY Sensory Bottles Last and How Do I Clean Them?
As long as it's sealed properly and only has non-perishable items inside, a sensory bottle can last for many months—sometimes even years! The real secret to keeping the water from going cloudy is to use distilled water instead of tap water. This makes a huge difference in preventing bacteria growth.
Of course, if you've made a nature bottle with fresh leaves or flower petals, it will have a much shorter life as the organic bits will start to break down.
Since the bottle is sealed for good, cleaning is a breeze. Just wipe the outside with a child-safe cleaner or a damp cloth to keep it hygienic and free of sticky fingerprints.
At Grow With Me, we believe in the power of simple, purposeful play. We hope these tips help you create wonderful sensory bottles that bring moments of calm and creativity to your home. Explore our stage-based play kits to discover more ways to support your child’s development through play.