
How to Make Sensory Bottles A Complete DIY Guide
At its core, a sensory bottle is simply a clear plastic bottle filled with a liquid base—like water or clear glue—and a mix of eye-catching fillers such as glitter, beads, or sequins. Once you’ve got your ingredients inside, you seal the lid tightly, and you're done. The whole point is to create a mesmerising visual experience that helps with focus and self-regulation.
The Magic of a Simple Sensory Bottle
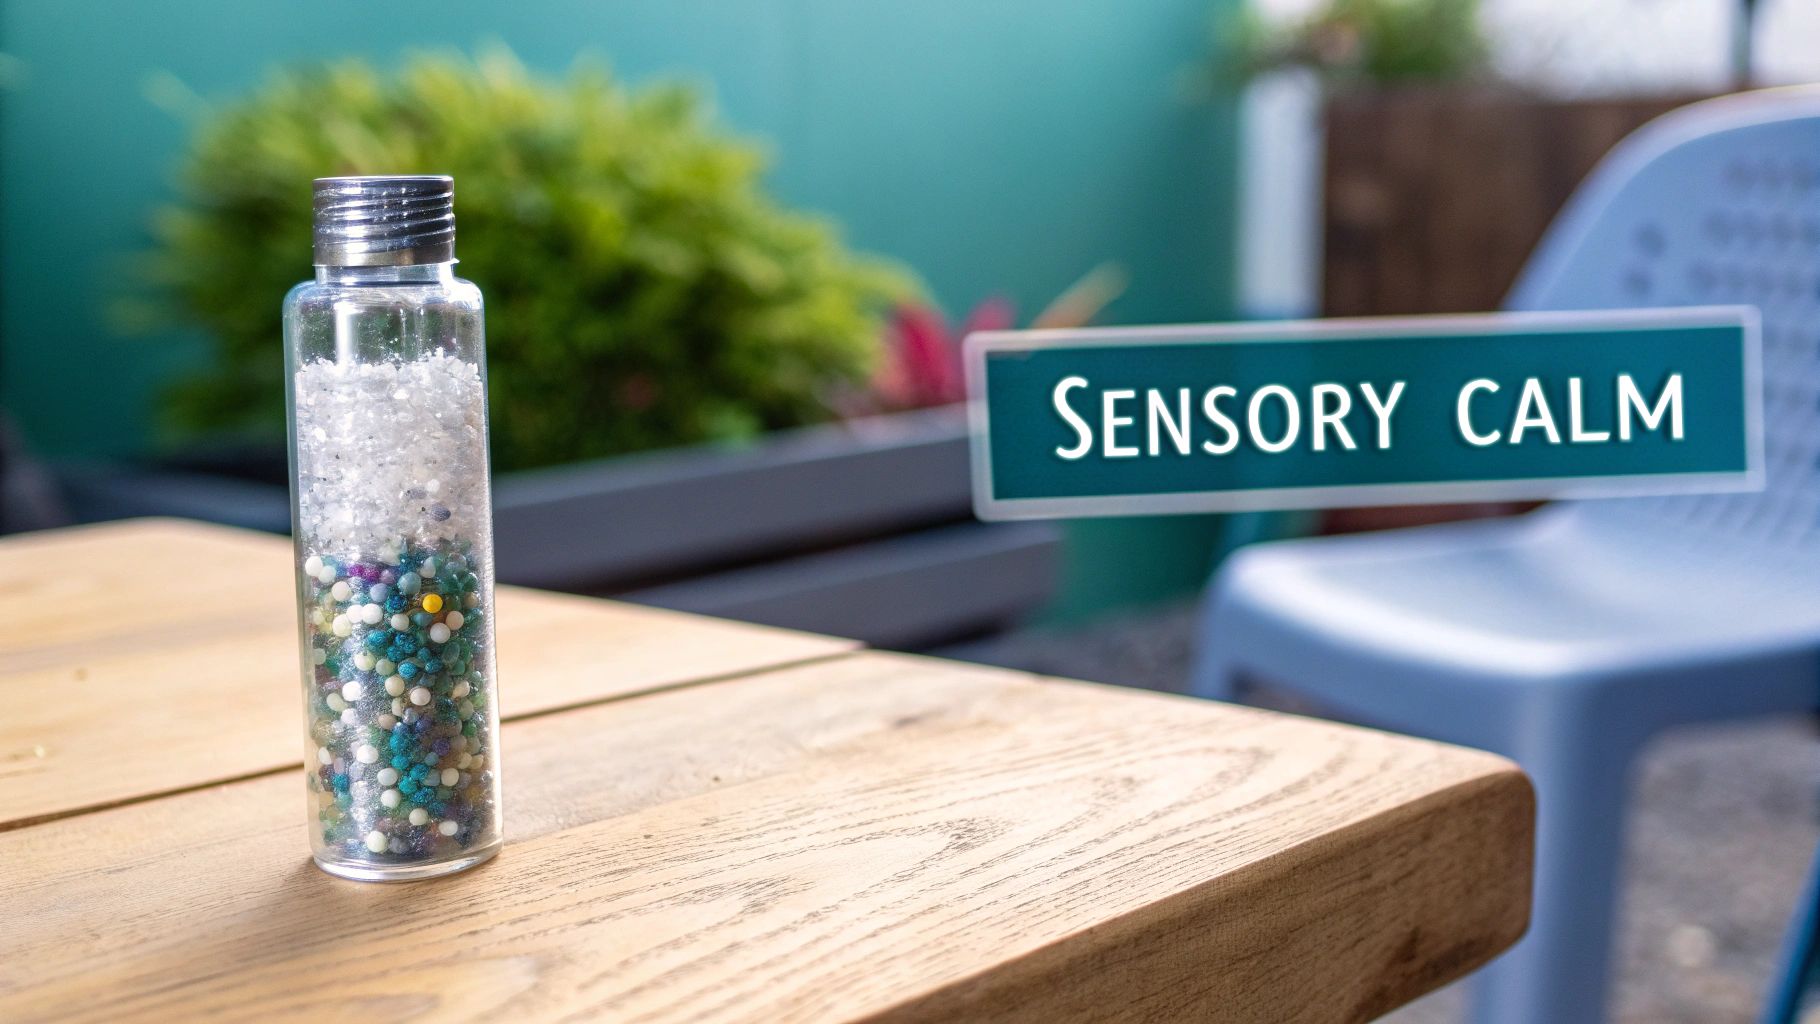
Often called calm-down jars or discovery bottles, these creations are so much more than just a fun craft project. They are tiny, self-contained worlds that act as a fantastic tool for sensory play, quiet time, and managing emotions. For a toddler, the swirling glitter is pure magic. For an older child, it can be a grounding object to hold onto during overwhelming moments.
The real beauty of learning how to make sensory bottles is just how simple and versatile they are. With a few common household bits and bobs, you can craft a tool that supports a child's development in several important ways.
- Emotional Regulation: Watching the contents swirl and slowly settle has a wonderfully soothing effect. It gives children a chance to process big feelings and find a moment of peace.
- Cognitive Skills: These bottles are brilliant for sparking curiosity. They encourage kids to watch closely, guess what will happen next, and understand cause and effect. They soon learn that a big shake creates a very different outcome than a gentle tilt.
- Sensory Exploration: They offer a safe, completely mess-free way for children to explore different colours, textures, and even sounds.
A Tradition of Creative Reuse
Repurposing containers like this taps into a long history of bottle use right here in the UK, blending practicality with a bit of imagination. Did you know that bottled beer has been produced in England for over 440 years? Hertfordshire is often credited as its birthplace. You can read more about the history of bottled beer in the UK to see just how far these containers have come.
Over the years, the rise of plastics opened up a world of new uses for bottles. Today, clean plastic bottles—especially the common 500ml size—are a firm favourite for craft projects, used by groups like The Scout Association, which has over 450,000 youth members. This hands-on, learn-by-doing approach makes creating sensory bottles a perfect modern craft.
A sensory bottle is a gateway to creative expression and calm. It’s not just about what you put inside; it's about the peaceful moments of observation it creates.
In this guide, we'll go beyond the basic steps. I’ll show you how to create truly stunning, personalised bottles that are designed to captivate and soothe.
Choosing Your Creative Ingredients
The real magic behind a mesmerising sensory bottle isn't some complex secret; it’s all about a bit of thoughtful planning. Every single piece you choose, from the container itself to the tiny treasures you pop inside, shapes the final experience. Let's walk through the three key elements you'll need to gather to bring your vision to life.
Start with the Right Bottle
Before you even think about glitter and goo, your first and most important decision is the bottle. While glass containers can look lovely on a shelf, sturdy plastic is always the safer bet, especially when you know it's going into the hands of an enthusiastic child. You need something that can handle being dropped, shaken, and rolled around without any risk of it shattering.
Recycled plastic drink bottles are perfect for this. Not only is it a great way to save money, but it’s a brilliant lesson in sustainability. In the UK, we're getting better at recycling, with government stats from 2020 showing that around 44% of our plastic packaging is given a new lease of life. This means finding the perfect empty bottle at home is easier than ever. Organisations like The Scout Association have fantastic guides that link household recycling with fun, educational crafts. Their sensory bottle activity guide is full of great ideas to get you started.
Select Your Liquid Base
The liquid you choose is the unsung hero of your sensory bottle. It’s what sets the whole mood and pace. The thickness of the liquid—its viscosity—is what controls how quickly everything inside floats, swirls, and eventually settles.
Plain old water is a great starting point, creating a fast-paced, energetic motion. It's fantastic for sound-focused bottles filled with things like beads or rice. But for that classic, slow-motion "calm-down" effect, you'll need to add something to thicken it up.
Choosing the right liquid base can feel a bit like a science experiment, but it's really just about knowing what effect you want. A thicker liquid will slow everything down, creating that lovely, dreamy suspension, while a thinner one keeps things zipping around.
Choosing Your Sensory Bottle Liquid Base
| Liquid Base | Suspension Speed | Clarity | Best For |
|---|---|---|---|
| Water | Very Fast | High | Sound-focused bottles or quick-moving visual effects with beads. |
| Water + Clear Glue | Slow | High | The classic "calm-down" bottle with glitter and sequins. |
| Water + Glycerine | Medium to Slow | Very High | Suspending slightly heavier items like small beads for longer. |
| Baby Oil & Water | N/A (Separates) | Varies | Creating distinct, un-mixable layers for ocean or lava lamp themes. |
Each base has its own personality, so don't be afraid to experiment with different ratios to get the flow just right for your creation.
A quick tip from experience: When you're mixing in glue or glycerine, always start with warm water. It makes a world of difference, helping everything dissolve smoothly without leaving you with clumps or a cloudy mixture.
Gather Your Fillers
Now we get to the really fun bit—deciding what goes inside! This is where your creativity can truly shine. Think beyond the usual glitter and consider adding bits and bobs that introduce different colours, textures, sounds, and even little stories to your bottle.
The main thing to remember is to pick items that are small enough to move around freely and won't break down or get mushy in the liquid over time.
- For a Bit of Sparkle: You can't go wrong with fine glitter, chunky sequins, or small, colourful beads that catch the light.
- To Tell a Story: Tiny plastic animals, Lego bits, googly eyes, or miniature buttons are perfect for creating a themed world inside the bottle.
- For a Touch of Nature: Small, smooth pebbles, clean sand, tiny seashells, or even flower petals (these work best in oil) can bring the outdoors in.
- To Make Some Noise: For a "dry" sensory bottle, things like dried rice, pasta shapes, or little jingle bells are perfect for creating a satisfying sound.
Assembling Your Sensory Bottle Masterpiece
Right, you’ve gathered all your goodies, and now for the really fun part—bringing your sensory bottle to life! This is where the magic happens. A few simple tricks can take your bottle from a quick craft to something truly special that will last for ages. Let's walk through it together, focusing on the little details that make all the difference.
First up, a clean workspace is a happy workspace. Make sure your bottle is sparkling clean and completely dry, both inside and out. Any leftover water or residue can make your liquid look murky later or, worse, stop the lid from sealing properly.
The basic idea is pretty straightforward: bottle, liquid, then all your fun fillers. This graphic gives you a quick overview.
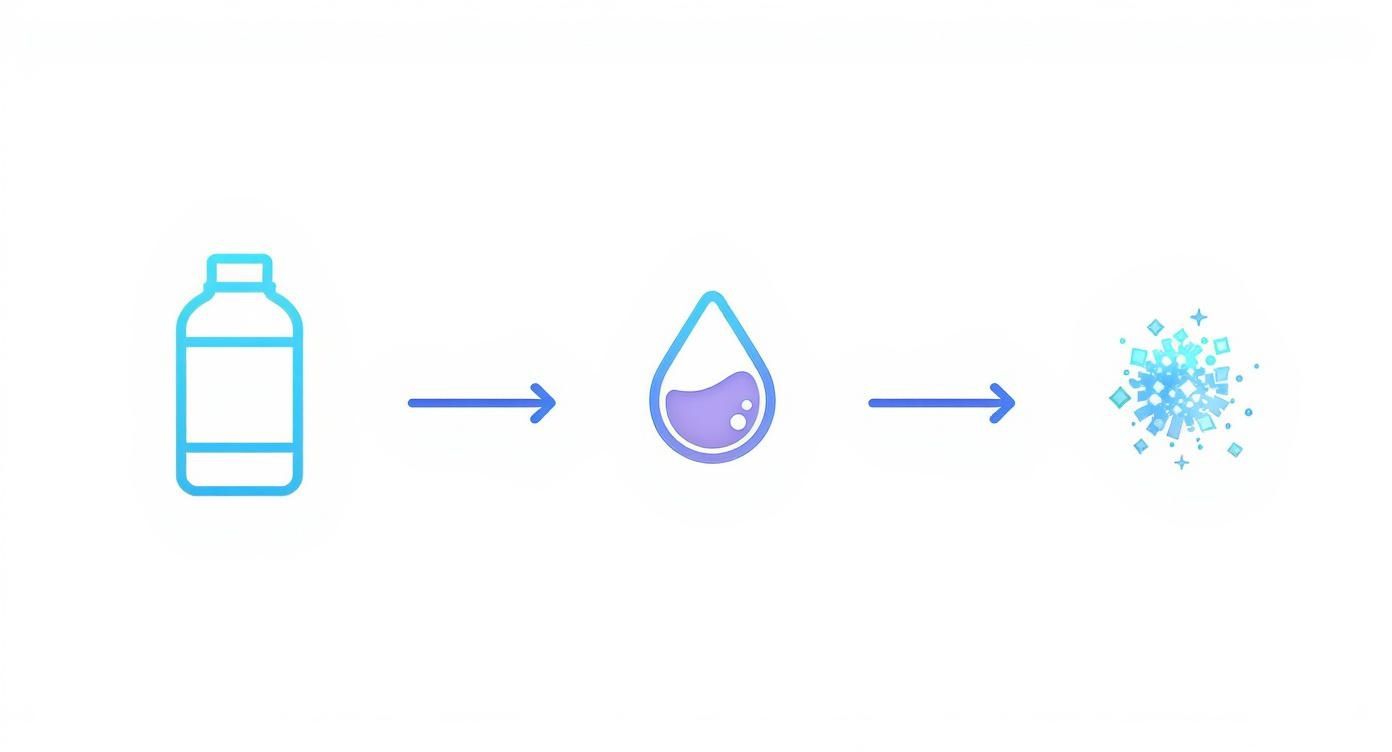
But it's how you combine these elements that really makes your creation sing.
Layering Your Fillers and Liquid
Let's get filling! I always start by pouring in the liquid base until the bottle is about two-thirds full. This leaves you enough room to pop in your fillers without everything spilling over the top.
A little tip from my own experience: use warm water, especially if you’re mixing in clear glue or glycerine. It just helps everything dissolve together so much more smoothly, avoiding those annoying sticky clumps.
And for glitter? To stop it from clumping up the second it hits the water, try this. Mix your glitter in a separate little cup with a splash of warm water and a single drop of washing-up liquid. Give it a good stir to create a slurry, and then pour that into your bottle. The soap works wonders, breaking the surface tension so the glitter disperses like a beautiful, sparkly cloud.
Once your glitter is in, you can start adding the rest of your treasures—sequins, beads, little plastic animals, you name it. Don't worry about getting the amounts perfect straight away. You can always add more, but taking things out is a whole different story! Getting your little one to help with this part is a fantastic way to build their dexterity. You can find more ideas like this in our guide to fine motor skills development activities.
Crucial Tip: Always leave about an inch of air at the top of the bottle. This gap is vital! It's what allows all the contents to move around and create that gorgeous, mesmerising swirl when the bottle is shaken.
Top up the bottle with the rest of your liquid, remembering to leave that all-important air gap. Now, give it a test swirl. Is everything moving too fast? Too slow? This is your chance to adjust. A bit more glue will slow things down, while a dash more water will speed them up.
Securing the Lid for Peace of Mind
Please, whatever you do, don't skip this final step. A loose lid is a recipe for a very glittery, very wet disaster, not to mention a potential choking hazard if any small bits escape. What you need is a permanent, waterproof seal that you can trust completely.
First, check that the rim of the bottle and the inside of the cap are totally dry. Then, run a generous line of strong glue around the bottle's threads.
- A hot glue gun is a great option. It sets fast and creates a really solid bond.
- Superglue (like Gorilla Glue) is my personal favourite for a bomb-proof seal. It creates an incredibly tough, waterproof bond that's almost impossible for curious little hands to break.
As soon as you've applied the glue, screw the cap on as tight as you can. Now, you have to be patient! Leave the bottle somewhere safe to cure for at least 24 hours before handing it over to your child. This gives the glue enough time to set properly, ensuring the seal is completely secure.
For a lovely finishing touch, you could even learn how to create custom labels that stand out. Imagine a label with a fun name like "Deep Sea Discovery" or even your child's name on it—it makes their new creation feel truly their own.
Creative Sensory Bottle Themes and Ideas

Once you've got the basic technique down, the real fun begins. The magic of sensory bottles truly lies in their endless possibilities—you can whip one up for just about any mood, season, or special interest.
Think of these ideas as starting recipes. They’re fantastic jumping-off points, but don’t be afraid to experiment and create your own signature concoctions. Each one offers a completely different sensory experience, from mesmerising, slow-drifting visuals to gentle, calming sounds.
Cosmic Galaxy Bottle
This one’s a classic for a good reason—it’s absolutely captivating. The aim is to create a pocket-sized nebula, with deep, dark space and swirls of suspended glitter that look like distant galaxies. It's my go-to for quiet time.
To get that cosmic look, you’ll need:
- A base of warm water mixed roughly 50/50 with clear glue.
- Black or dark blue food colouring to achieve that deep space background.
- Plenty of fine silver glitter to act as your twinkling stars.
- A dash of chunky iridescent glitter or star-shaped sequins for that extra pop.
There’s something incredibly soothing about watching the glitter slowly swirl through the dark liquid. It's a brilliant tool for helping an active mind settle down and focus.
Ocean in a Bottle
This theme brings the gentle ebb and flow of the sea right into your child's hands. It works by using two liquids that won’t mix, creating a wonderfully realistic wave effect when the bottle is tilted. It’s a great little science lesson on liquid density, too!
To build your own little aquatic world:
- Fill the bottle about halfway with water.
- Add a few drops of blue food colouring.
- Top it up with baby oil or mineral oil, leaving just a small air gap at the very top.
- Pop in some small seashells, fish-shaped beads, or a pinch of blue sequins before you seal it tight.
As you tip the bottle back and forth, the blue water and clear oil create rolling waves, with the little sea treasures tumbling about. For more simple yet engaging ideas like this one, it's worth exploring different sensory play ideas for babies.
Sensory bottles are so much more than a simple craft project; they're a powerful therapeutic tool. The controlled visual and auditory input can help a child self-regulate, especially when they're feeling overwhelmed.
Nature Explorer Bottle
This bottle is all about bringing the textures and sounds of the outdoors inside, but without the mess! You can make this as either a "wet" or "dry" shaker, depending on what kind of sensory experience you’re going for.
For a dry, sound-focused bottle, simply fill it with natural finds like:
- Tiny, smooth pebbles
- Clean, dry sand
- Small twigs or acorns
- Dried lentils or beans
When shaken, it creates a lovely, gentle rattling sound, almost like a rainstick. For a wet version, try adding small leaves, flower petals, or tiny pebbles to water. You'll see the natural items float and drift gracefully, which offers a completely different kind of calming visual focus.
Feeling inspired? Thinking about how you can transform a mason jar can spark even more creative themes for your next sensory bottle project.
To give you a quick cheat sheet for some popular ideas, I've put together a simple table with a few of my favourites.
Sensory Bottle Recipe Ideas
| Theme Idea | Key Ingredients | Primary Sensory Effect |
|---|---|---|
| I-Spy Bottle | Dry rice or sand, tiny alphabet beads, buttons, small toys | Visual tracking and cognitive challenge |
| Lava Lamp Bottle | Water, vegetable oil, food colouring, effervescent tablets | Visual stimulation (fizzing, bubbling) |
| Magnetic Discovery | Water or corn syrup, paper clips, pipe cleaner pieces | Fine motor skills and scientific exploration |
| Calm-Down Swirl | Clear glue, warm water, fine glitter, food colouring | Visual and emotional regulation (slow-moving) |
Remember, these are just starting points. The best sensory bottles are often the ones you and your child invent together using whatever you have on hand. Happy creating
Understanding the Benefits of Sensory Play
https://www.youtube.com/embed/NpHn2ephUbs
There's so much more to a sensory bottle than just swirling glitter and bright colours. These simple creations are absolute powerhouses for a child's development. Once you understand why they work so well, you start to see them not just as a fun craft, but as a vital tool for learning, growing, and managing those big little feelings.
Think about it: when a child gives a bottle a good shake and watches everything float and drift, they're basically conducting their own mini science experiment. They're discovering cause and effect, guessing what will happen next, and sharpening their observation skills. This kind of hands-on, active learning is exactly what builds a strong foundation for cognitive development.
Fostering Emotional Regulation
One of the most incredible things about sensory bottles is how they help with emotional regulation. You've probably heard them called "calm-down jars," and for good reason. When a child is feeling overwhelmed, anxious, or just plain frustrated, the slow, mesmerising movement inside the bottle can be incredibly grounding.
Watching the glitter settle gives their busy mind a single, predictable thing to focus on. This simple act can help slow a racing heart and bring a moment of calm. It's a tangible, physical strategy for navigating big emotions, teaching them how to self-soothe—a skill that will serve them for life.
Enhancing Motor Skills and Sensory Input
Let’s not forget the physical side of things! The simple act of gripping, turning, and shaking a bottle is brilliant for strengthening little hands and wrists. These movements are key for developing the fine motor skills they’ll need later for writing, drawing, and even tying their shoelaces.
Sensory bottles also offer a fantastic way to provide sensory input without the chaos or mess. They give children a safe, contained way to explore different textures, sounds, and visual effects. This makes them an invaluable resource for all children, especially those with sensory processing needs. Our guide on choosing sensory toys for babies dives deeper into why this is so important at every stage.
This approach isn't new. In fact, the UK has been a pioneer in sensory-based therapy ever since the first purpose-built Snoezelen centre opened back in the late 1980s. These multi-sensory environments use specialised equipment to help people regulate their experiences, and a handmade sensory bottle fits right in with that supportive, child-led philosophy.
A sensory bottle acts as a bridge between play and learning. It quietly teaches focus, patience, and self-awareness, all within a mesmerising, self-contained world.
Ultimately, when you make a sensory bottle, you're creating far more than just a toy. You’re building a powerful tool that nurtures a child’s mind, helps them find their balance, and strengthens their body, all through the simple magic of play.
Answering Your Sensory Bottle Questions
Even the most straightforward craft project can have its little quirks. When you're learning how to make sensory bottles, a few common issues can pop up. Not to worry, though – I've run into them all, and the fixes are usually surprisingly simple. Let's walk through some of the most frequent questions.
Why Has My Sensory Bottle Gone All Cloudy?
It’s a bit deflating when your vision of a crystal-clear bottle turns into a murky mess. Cloudiness nearly always comes down to one of two things. First, it could be your tap water. In many parts of the UK, tap water is full of minerals that don't play nicely with ingredients like craft glue, causing a reaction that clouds the liquid.
The easiest solution is to use distilled water. It's a small change that guarantees a perfectly clear base every single time. The other culprit could be your fillers. Some dyed materials can bleed colour into the water, so it's always a good idea to give them a quick rinse before popping them in the bottle.
How Can I Stop All the Glitter from Sticking Together?
Ah, the dreaded glitter clump. You want a mesmerising swirl, but instead, you get a sad little cluster that sinks like a stone. This is a classic sensory bottle problem, and the secret weapon is probably already in your kitchen. The issue is water's surface tension, which makes the glitter want to stick together.
My go-to trick is to mix the glitter in a separate cup first. Add a splash of warm water and just a single drop of washing-up liquid. Give it a stir to create a thin paste, and then pour that into your bottle. The soap breaks the surface tension, allowing the glitter to disperse and float beautifully.
This little prep step is a game-changer for getting that dreamy, slow-motion sparkle.
What's the Best Way to Seal the Lid Properly?
Making the bottle completely leak-proof and child-safe is the most important final step. You need a permanent seal you can trust, so you don't end up with a glittery, gluey puddle on your floor.
First, make sure the rim of the bottle and the inside of the cap are bone dry. Then, apply a generous, unbroken bead of a strong, waterproof glue around the bottle's threads. I've found a hot glue gun or a strong superglue gives the most reliable seal. Screw the cap on tightly right away, and then—this is key—leave it alone to cure for at least 24 hours before handing it over for playtime.
At Grow With Me, we're all about the magic of hands-on, developmental play. Our curated subscription boxes arrive filled with high-quality, age-appropriate toys designed to support your child's learning adventure at every stage. Discover your first play kit today!